How many nights do you stay up far too late browsing Pinterest for hours? If you’re anything like me, the answer is every. single. night. Even after the kids are long asleep and I should be getting some much needed rest, I’m typically pinning my life away. Often times they are pins I’ll never do or pins that are completely unrealistic (I’m lookin’ at you, “Dream Home” board), but ones I am totally hooked on are the ‘IKEA hack’ pins!
When my 4-month-old was about five days old, we got a call from our storage unit saying it had flooded. We lost about 85% of our furniture. Total bummer to say the least! So, when we finally moved into our new house we literally had NO furniture. I decided I was going to do some refurbishing and maybe try out some of those IKEA hacks I’ve been pinning for so long.
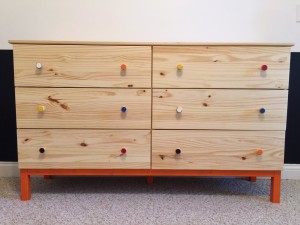
For my first hack I transformed a basic Ikea Tarva dresser–A DIY’ers dream dresser because you can do almost anything with it! This particular dresser was for my oldest son’s bedroom, which is mostly black and white with pops of primary and secondary colors. The following outlines the steps I took to get this look:
- Visit your nearest IKEA to purchase your Ikea Tarva dresser. For me this was 2.5 hours away but totally worth the drive! They come in 3 or 6 drawers. I chose the 6 drawer dresser.
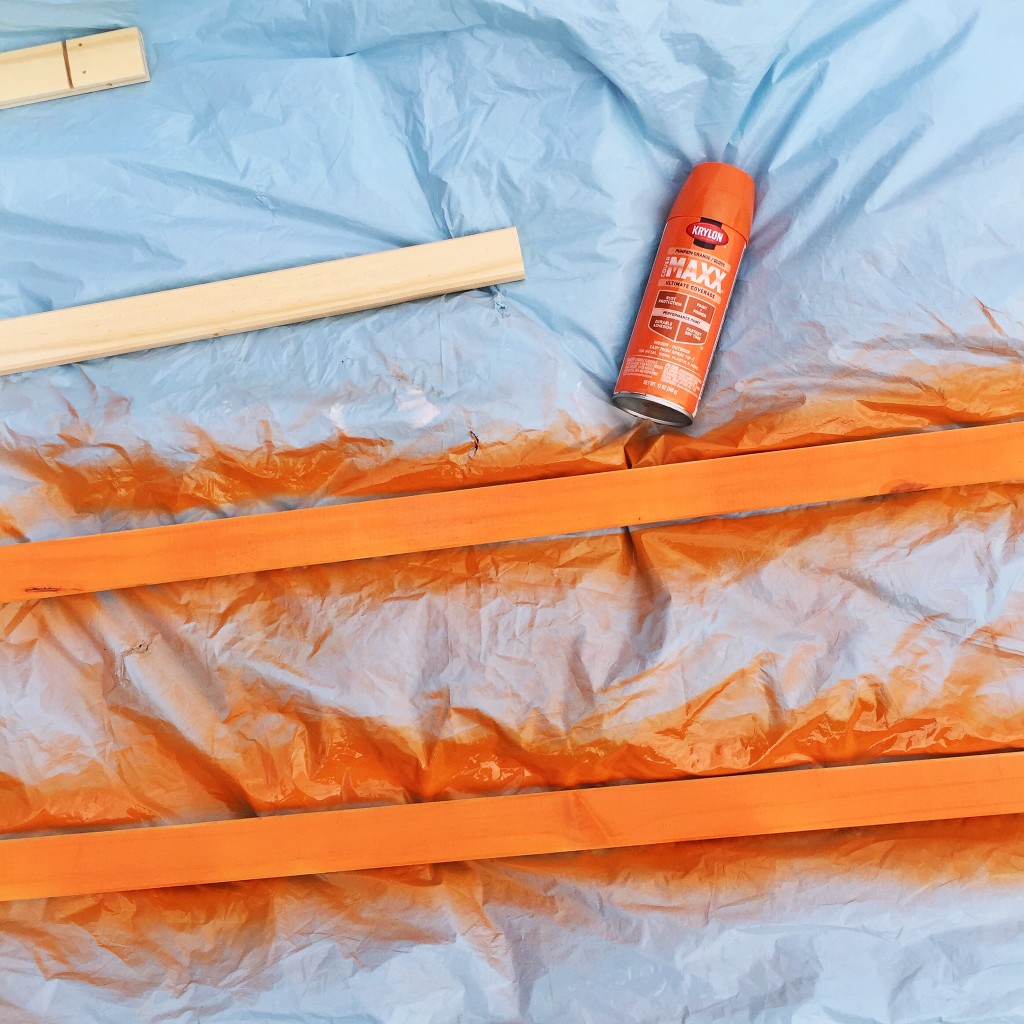
- Choose your paint colors and type. I used an all purpose paint plus primer spray paint–so much quicker and cheaper than regular paint. I chose orange for mine.
- This is a raw wood dresser, and you can paint pretty much any piece you like (or the whole thing!). Decide which parts you want painted and paint those first before assembling the dresser.
 After your parts have dried, start putting together the dresser. SOOO many parts that you’ll want to go crazy, but the key to putting together anything IKEA is to pay very close attention to the directions or it could go south really quickly. Watch out for tiny toddlers who like to steal screws. I may or may not still be missing one.
- After the main part of the dresser is put together, decide which colors you’d like for the knobs. I wanted multicolor, so I purchased some acrylic multi-purpose craft paint 2/$1 at Walmart and used yellow, orange, blue, red, white, and black and painted two knobs each color.
- Using a small detail brush and my paints, I painted just the circle on the very front of the knob, but you can paint the whole knob if you choose. I just wanted an accent and to still see the raw wood on the rest of the knob.
 After they dry, put the knobs on the drawers however looks best to you. I decided to mix them up.
- After you have finished painting everything, apply a thin coat of wood sealer on the entire dresser to protect it from stains and marks.
- PLEASE make sure you securely anchor all furniture to the wall! Especially with little ones around!


